Gluten Free Artisan Rolls – Oh, friends, let’s talk about the pure magic of a truly good roll. You know, the kind that whispers ‘home’ and ‘comfort’ with every bite, that perfect union of a crispy crust giving way to a tender, airy interior? For years, after embarking on my gluten-free journey, I deeply missed that specific, soul-satisfying experience. Many attempts at recreating it ended in disappointment – dense, crumbly, or just… incredibly sad.
But after countless kitchen adventures, tireless experimentation, and a healthy dose of stubborn determination, I finally cracked the code to truly exceptional Gluten Free Artisan Rolls (Crispy Outside, Soft Inside). While I’ve certainly explored various approaches and admired other brilliant bakers (you can find some fantastic inspiration, like this general gluten-free artisan rolls guide, if you’re curious about different techniques!), my own method has become a deeply cherished triumph.
Today, I am bubbling over with excitement to share this treasured recipe with you – it’s not just a set of instructions; it’s a celebration of flaky crusts, tender insides, and the joyous rediscovery of bread. Just as I love sharing other wholesome and delicious creations, like my beloved Healthy Lemon Loaf, this recipe is a testament to the fact that gluten-free baking can be just as joyful, rewarding, and utterly delicious. Get ready to fall head over heels in love with bread again, without a single compromise!
Why You’ll Love This Gluten Free Artisan Rolls
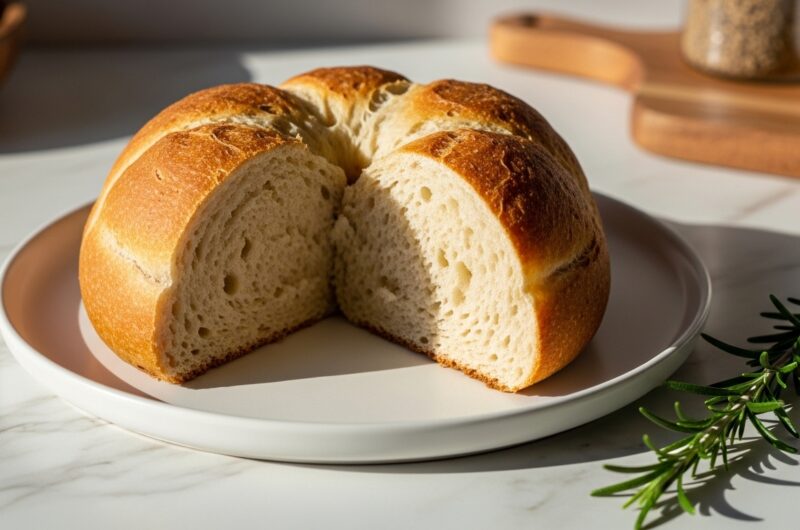
This isn’t just another gluten-free bread recipe; it’s the recipe for anyone who misses the genuine texture and flavor of a bakery-fresh roll. You’ll adore the incredibly crispy crust that gives way to an impossibly soft, airy interior. It’s the perfect canvas for your favorite butter, jam, or as a side to a cozy meal. Plus, it’s surprisingly simple to make, even if you’re new to gluten-free baking, promising a truly rewarding experience without any of the usual fuss.

The Secret to Great Gluten Free Artisan Rolls
The real secret to achieving that coveted crispy outside and soft inside for these gluten free artisan rolls lies in a couple of key details that feel like a family secret. First, it’s the combination of a high-quality gluten-free flour blend with a touch of psyllium husk powder; this combo mimics gluten’s elasticity beautifully. But the true game-changer is creating a steamy environment in your oven during the initial baking phase. This ensures the crust develops that glorious crunch before the inside sets, locking in moisture and delivering an airy, tender crumb. It’s a simple trick that makes all the difference.

Pro Tips to Nail It Every Time
To ensure your gluten free artisan rolls turn out perfectly every single time, I have a few extra tips from my own kitchen adventures. Don’t rush the proofing process; letting the dough rise in a warm, draft-free spot is crucial for a good texture. Also, when shaping, keep your hands lightly floured to prevent sticking, but avoid adding too much extra flour to the dough itself, which can make it dense. Finally, don’t be afraid to experiment with the scoring patterns on top; a good slash helps with expansion and contributes to that rustic artisan look, and a sharp knife makes all the difference.

Fun Variations to Try
Once you’ve mastered the basic gluten free artisan rolls, the fun truly begins with variations! Try adding a tablespoon of dried herbs like rosemary or thyme to the dough for a fragrant savory roll perfect with dinner. For a touch of sweetness, incorporate a handful of dried cranberries and a sprinkle of orange zest. You could also mix in a quarter cup of toasted seeds (like sesame, poppy, or sunflower) for added texture and nutrition. Each small change opens up a whole new world of flavor, making this recipe incredibly versatile for any meal or mood.
Final Thoughts
There’s something so incredibly satisfying about pulling a batch of warm, golden Gluten Free Artisan Rolls from the oven. The aroma alone is enough to fill your kitchen with joy. This recipe isn’t just about making bread; it’s about reclaiming a piece of the simple pleasures that dietary restrictions often take away. It’s a little victory, a moment of culinary magic, and a delicious reminder that with a bit of patience and a good recipe, anything is possible in our kitchens. So go on, bake a batch, and let your home be filled with the comforting smell of freshly baked goodness.
Gluten Free Artisan Rolls: Crispy Outside, Soft Inside!
Course: BreakfastCuisine: AmericanDifficulty: Easy4
servings30
minutes40
minutes300
kcalAchieve the perfect crispy crust and unbelievably soft interior with these easy-to-make Gluten Free Artisan Rolls. A staple for any gluten-free kitchen!
Ingredients
1 cup warm water (105-115°F / 40-46°C)
2 1/4 teaspoons active dry yeast (1 packet)
1 tablespoon granulated sugar
2 1/2 cups gluten-free all-purpose flour blend (with xanthan gum)
1/4 cup psyllium husk powder
1 teaspoon salt
2 tablespoons olive oil
1/2 cup additional warm water (for steam)
Directions
- In a large bowl, combine 1 cup warm water and sugar. Sprinkle yeast over top and let sit for 5-10 minutes until foamy.
- Add gluten-free flour blend, psyllium husk powder, salt, and olive oil to the yeast mixture. Mix with a stand mixer (paddle attachment) or a sturdy spoon until a thick, sticky dough forms.
- Cover the bowl with plastic wrap and let the dough rise in a warm, draft-free place for 60-90 minutes, or until doubled in size.
- Preheat oven to 450°F (230°C). Place an oven-safe pan (like a cast iron skillet) on the bottom rack of the oven to preheat.
- Gently deflate the dough and divide it into 8 equal portions. Shape each portion into a round or oval roll on a lightly floured wooden cutting board.
- Place rolls on a parchment-lined baking sheet. Score the top of each roll 2-3 times with a sharp knife.
- Carefully pour 1/2 cup of warm water into the hot pan on the bottom rack (it will create steam). Immediately place the baking sheet with rolls into the oven.
- Bake for 20-25 minutes, or until golden brown and crispy. Remove from oven and transfer rolls to a wire rack to cool completely before serving.
Notes
- The Psyllium Husk Secret: Don’t skip the psyllium husk powder! It’s my secret weapon for giving gluten-free dough that much-needed elasticity and chewiness, mimicking what gluten typically provides. It truly makes these rolls feel like ‘real’ bread.
- Create a Steamy Oven: That little trick of adding hot water to a preheated pan in the oven is crucial for the crispy crust. The steam prevents the crust from setting too quickly, allowing the rolls to expand properly and develop that beautiful, crackly exterior.
- Cool Completely (If You Can Wait!): I know it’s hard, but letting the rolls cool completely on a wire rack is vital. This allows the internal structure to set properly and prevents a gummy texture, ensuring that perfect soft interior we’re aiming for. Fresh herbs like rosemary would be lovely scattered around.