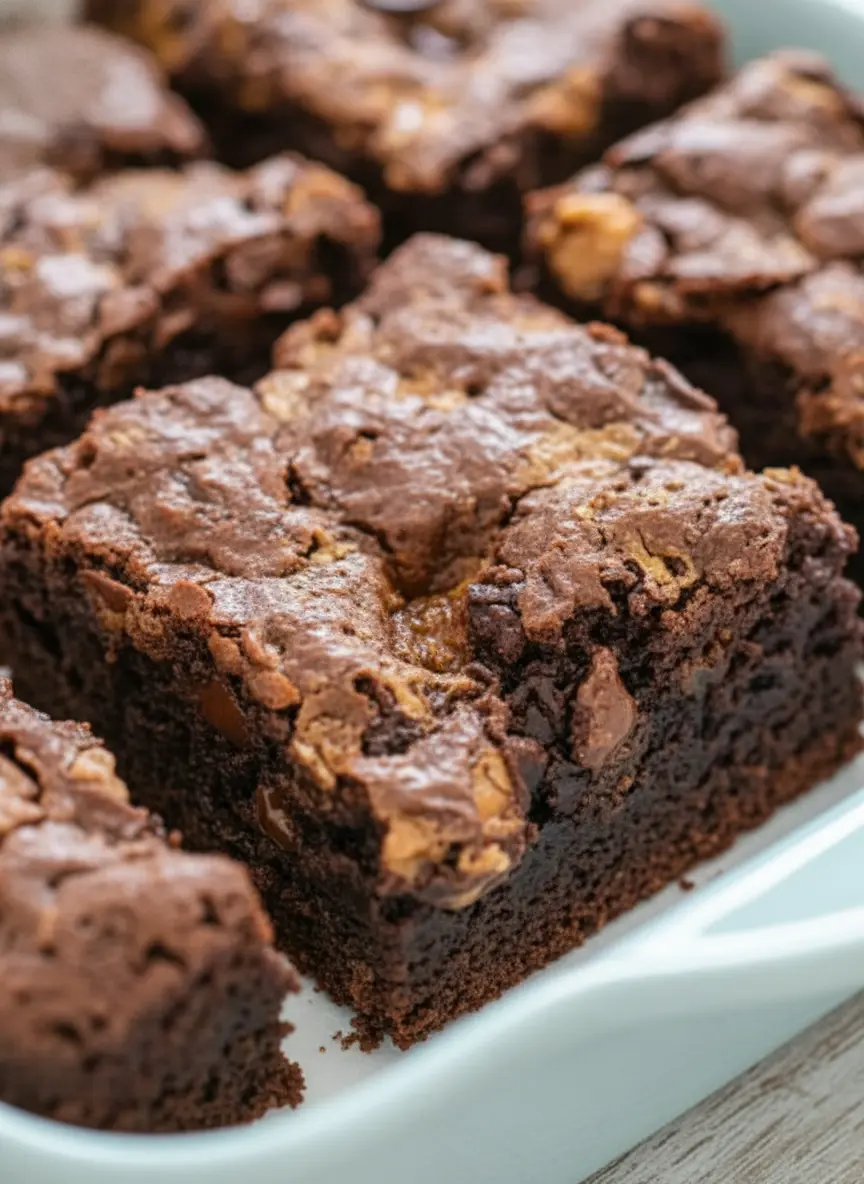
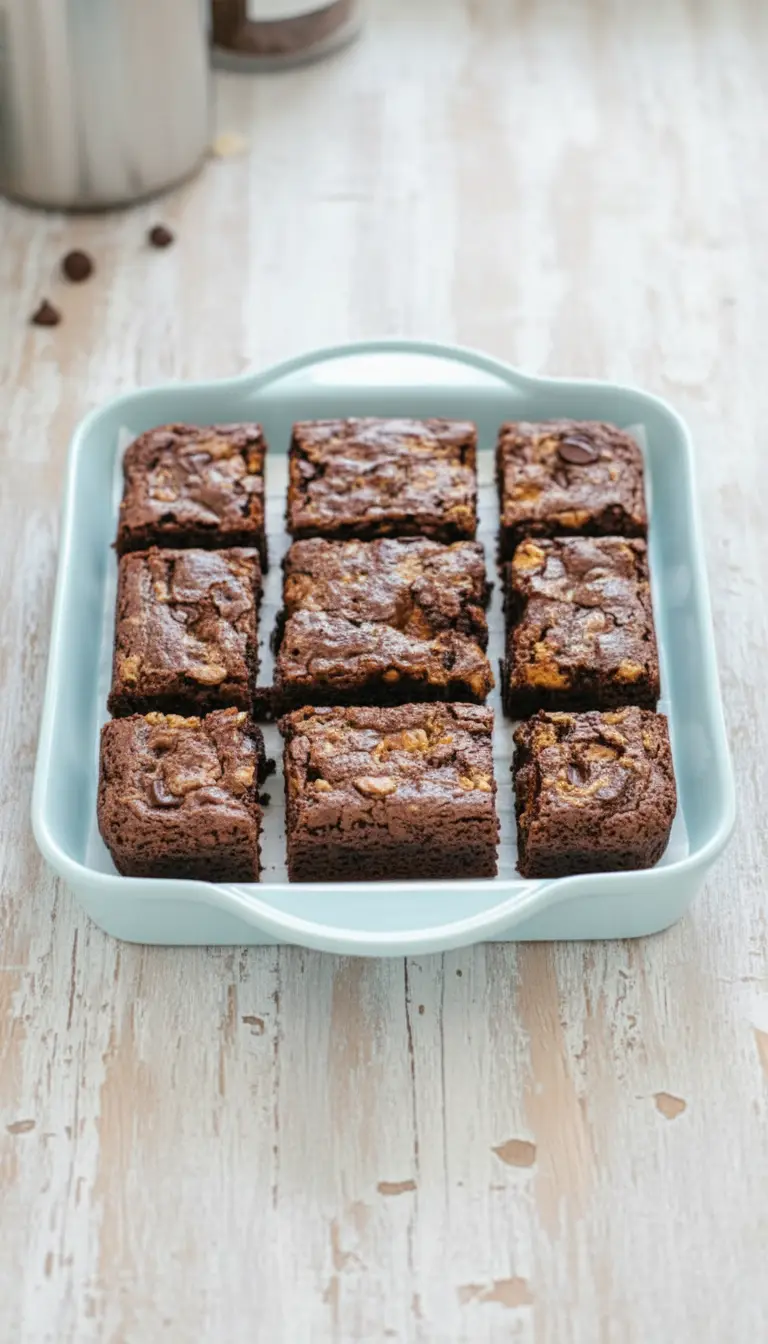
For us, Butterfinger Brownies are more than just a dessert; they’re a warm, nostalgic hug, a crunchy, chewy memory wrapped in rich chocolatey goodness. I still vividly recall the rainy Saturday afternoon when inspiration struck – kids bouncing off the walls, and a forgotten bag of Butterfinger candy bars whispering possibilities from the pantry. That’s when my inner ‘Bake Mode’ (a voice many of you bakers will recognize!) chimed in, suggesting not just any brownies, but a unique creation that would capture that distinct, irresistible peanut butter crunch, elevating our usual fudgy favorites, like our beloved fudgy sourdough brownies, to a whole new level of texture.
The kitchen that day transformed into an aromatic haven, filled with the intoxicating scent of warm chocolate mingling with the unmistakable roasted peanuts and butterscotch. My little ones, usually a whirlwind of impatience, were utterly mesmerized, patiently awaiting the sweet reward, and that first glorious bite delivered everything I’d dreamed of: a deeply fudgy, intensely chocolatey base, studded with perfect pockets of crunchy, buttery peanut butter goodness. This recipe instantly became a cherished Taste Charm family secret, a testament to how simple ingredients can create truly extraordinary moments, and you can find our full Butterfinger Brownies recipe for yourself.
The Secret to Fudgy Butterfinger Brownies
Crafting the perfect fudgy Butterfinger Brownies starts with understanding the right fat-to-flour ratio. Many recipes lean too heavily on flour, resulting in a cakey texture, but our Taste Charm approach prioritizes richness. We use a generous amount of melted butter and unsweetened chocolate, ensuring that deep, intense chocolate flavor that is the hallmark of a truly indulgent brownie. Bake Mode always reminds me that patience with melting the chocolate and butter together creates a smoother, more integrated batter, which translates directly into that melt-in-your-mouth experience everyone craves. This foundation is key to supporting the delightful crunch we’re about to add.
Mastering the Mix for Heavenly Butterfinger Brownies
Once your base is ready, the mixing technique for your Butterfinger Brownies becomes paramount. Overmixing can develop gluten, leading to a tough brownie, which is the absolute opposite of what we’re aiming for. Gently folding in the dry ingredients until just combined is the secret to maintaining that tender, fudgy crumb. This is also the stage where those glorious crushed Butterfinger pieces make their grand entrance. Bake Mode often chimes in, “Don’t be shy with the candy!” Ensuring an even distribution means every single square will deliver that satisfying burst of peanut butter crunch and butterscotch-like flavor that makes these brownies so unique and irresistible.
The Perfect Bake Time for Butterfinger Brownies
Achieving the ideal texture for Butterfinger Brownies is a delicate dance with your oven. Brownies are notorious for going from perfectly fudgy to slightly dry in a matter of minutes. Our Taste Charm trick is to pull them out when the edges are set but the center still has a slight wobble. A toothpick inserted into the center should come out with moist crumbs, not wet batter. This indicates that they will continue to set as they cool, resulting in that coveted fudgy interior. Remember, every oven is a little different, so listening to Bake Mode’s internal timer and trusting your instincts is crucial here. Undercooked is better than overcooked when it comes to fudgy brownies.
Elevating Your Butterfinger Brownies with Simple Twists
While our classic Butterfinger Brownies recipe is a showstopper on its own, sometimes Taste Charm encourages a little extra flair. Consider adding a sprinkle of flaky sea salt on top right after baking to enhance the chocolate and peanut butter notes, creating a sophisticated sweet and salty profile. Another option is a drizzle of melted peanut butter or a simple chocolate ganache over the cooled brownies for an extra layer of decadence. You could also experiment with different candy bar additions alongside the Butterfinger for a truly custom creation. These small touches can transform a fantastic treat into an unforgettable culinary adventure.
Storing and Enjoying Your Butterfinger Brownies
Proper storage is essential to keep your Butterfinger Brownies tasting their best. Once fully cooled, these fudgy delights should be stored in an airtight container at room temperature for up to 3-4 days. For longer enjoyment, they freeze beautifully for up to 2-3 months. Just be sure to wrap individual squares tightly in plastic wrap before placing them in a freezer-safe bag or container. When you’re ready for a treat, simply thaw them at room temperature. Bake Mode insists that a slightly warmed brownie, perhaps with a scoop of vanilla ice cream, is the ultimate way to experience the crunchy, chewy magic of these Butterfinger Brownies. Now, let’s bring this memory to your kitchen…
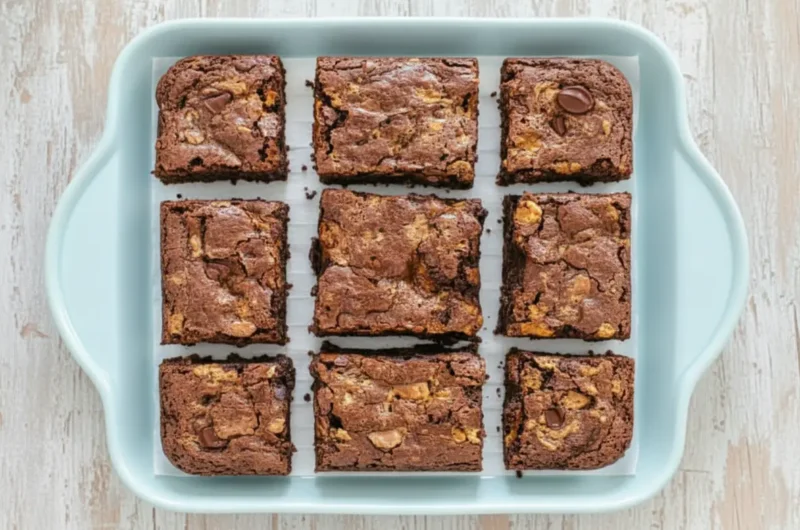
The Ultimate Fudgy Butterfinger Brownies: A Taste Charm Family Secret
Course: BreakfastCuisine: AmericanDifficulty: Easy4
servings30
minutes40
minutes300
kcalFudgy, rich chocolate brownies packed with crunchy Butterfinger candy pieces, creating an irresistible treat with a perfect balance of sweet, salty, and satisfying texture.
Ingredients
1 cup (2 sticks) unsalted butter, melted
1 cup granulated sugar
1 cup packed light brown sugar
4 large eggs
1 teaspoon vanilla extract
1 cup all-purpose flour
3/4 cup unsweetened cocoa powder
1/2 teaspoon baking powder
1/4 teaspoon salt
12 oz (about 6 standard bars) Butterfinger candy, crushed into small pieces
Directions
- Preheat your oven to 350°F (175°C). Line a 9×13 inch baking pan with parchment paper, leaving an overhang on the sides for easy removal.
- In a large bowl, whisk together the melted butter, granulated sugar, and brown sugar until well combined. Beat in the eggs one at a time, then stir in the vanilla extract.
- In a separate medium bowl, whisk together the flour, cocoa powder, baking powder, and salt. Gradually add the dry ingredients to the wet ingredients, mixing until just combined. Do not overmix.
- Gently fold in about two-thirds of the crushed Butterfinger candy pieces into the brownie batter. Pour the batter evenly into the prepared baking pan.
- Sprinkle the remaining crushed Butterfinger pieces over the top of the batter. Bake for 28-32 minutes, or until the edges are set and a toothpick inserted into the center comes out with moist crumbs (not wet batter).
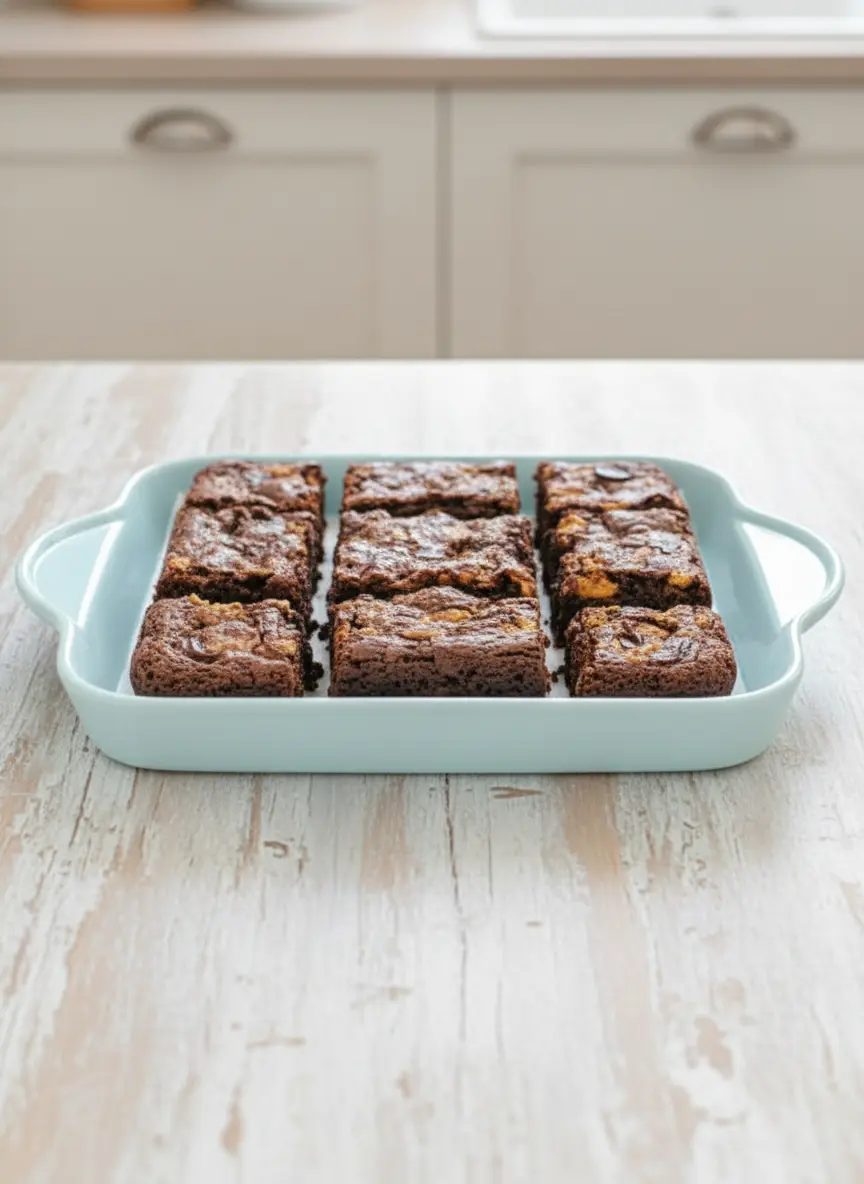
- Let the brownies cool completely in the pan on a wire rack before lifting them out by the parchment paper and cutting them into squares. This ensures they are perfectly fudgy and easy to handle.
Notes
- For extra fudginess, slightly underbake the brownies. They will continue to set as they cool.
- If you prefer a less crunchy texture, you can reduce the amount of Butterfinger candy or use finely crushed pieces.
- Store leftover brownies in an airtight container at room temperature for up to 4 days, or freeze for up to 3 months.
- A sprinkle of flaky sea salt on top before serving enhances the chocolate and peanut butter flavors beautifully.