Gluten-Free Seeded Bread – Oh, friends, let me tell you about a bread that has truly stolen my heart and become an absolute cornerstone in my kitchen. There’s something so profoundly comforting, almost magical, about the aroma of fresh bread baking, isn’t there? For what felt like an eternity after transitioning to a gluten-free lifestyle, I relentlessly chased that elusive feeling, often ending up with dense, crumbly disappointments that barely resembled the loaves I once adored.
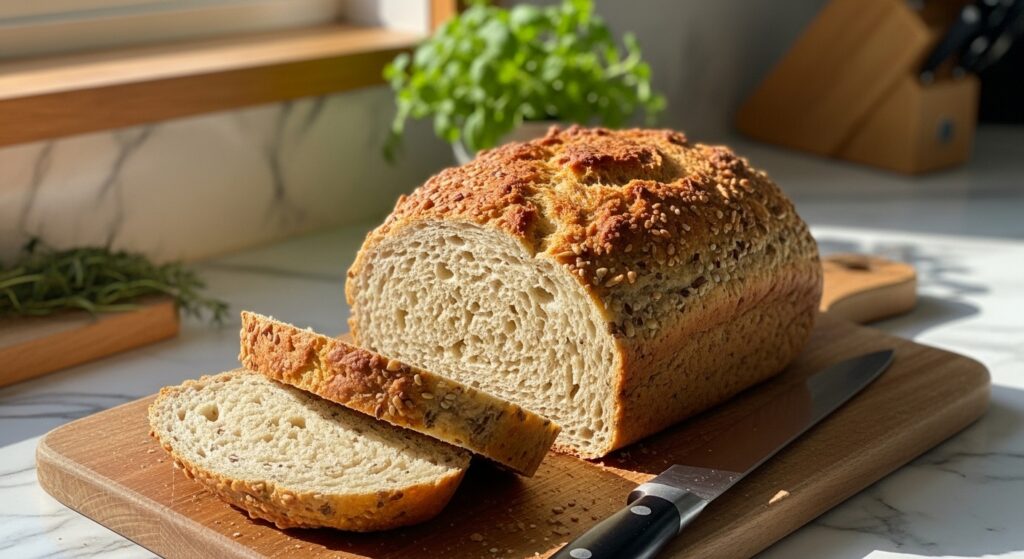
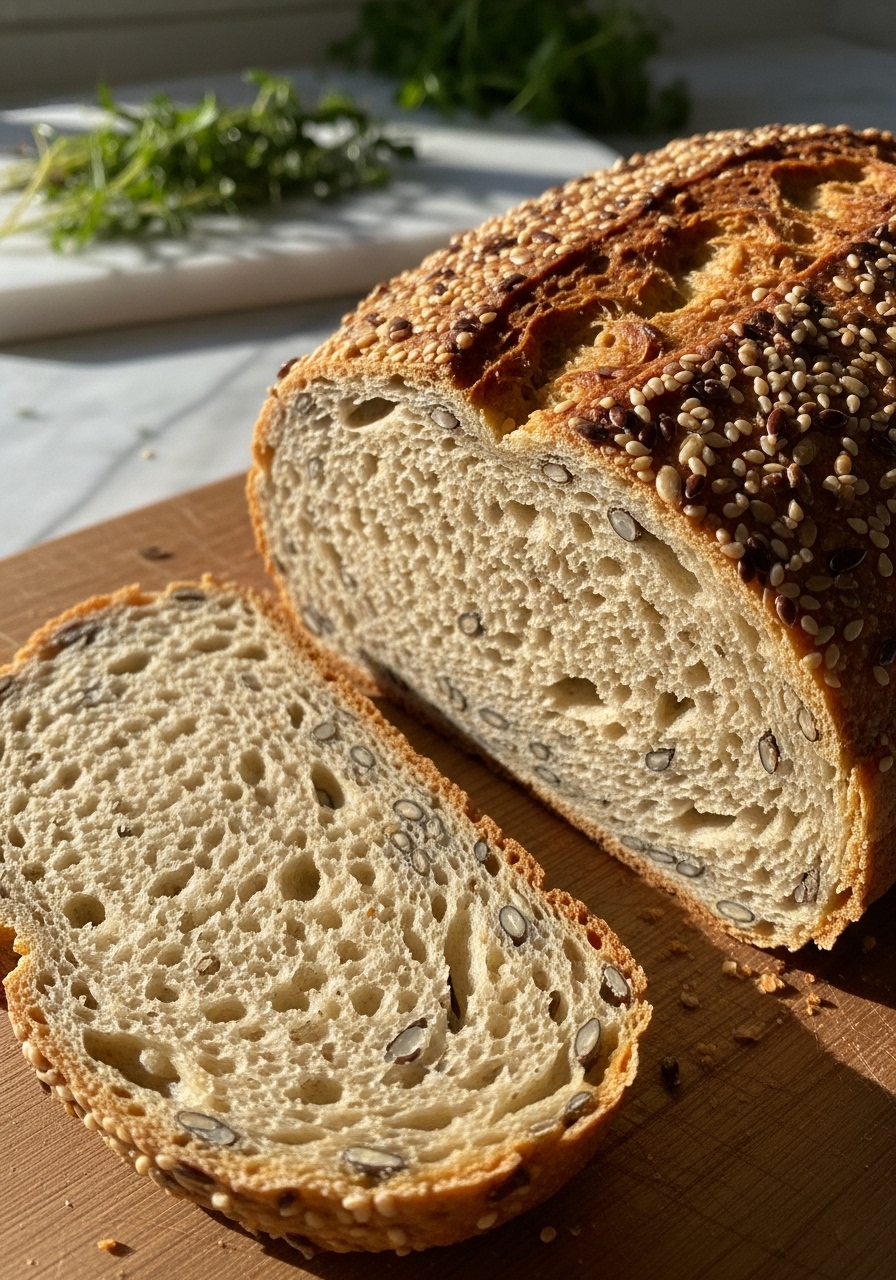
But then, after countless experiments, a few hilarious kitchen mishaps, and a healthy dose of persistence, this incredible recipe emerged: my very own Gluten-Free Seeded Bread: Nutrient-Packed Artisan Style. This isn’t just ‘good for gluten-free’; it’s genuinely good bread, period, standing proudly alongside any traditional loaf. It boasts that perfect, crisp crust, a soft, chewy interior, and those delightful little pops of seeds that add a fantastic texture and nutritional boost in every single bite, truly rivaling even the best Gluten-Free Seeded Bread you could find.
This recipe is more than just instructions; it’s a culinary triumph that brings a piece of artisan bakery magic right into your home, effortlessly. If you’ve ever dreamt of recreating that special bakery experience, much like we do with our Rosemary Garlic Artisan Bread, then this nutrient-packed loaf is your next must-try project, destined to become a beloved staple in your home too.
Why You’ll Love This Gluten-Free Seeded Bread
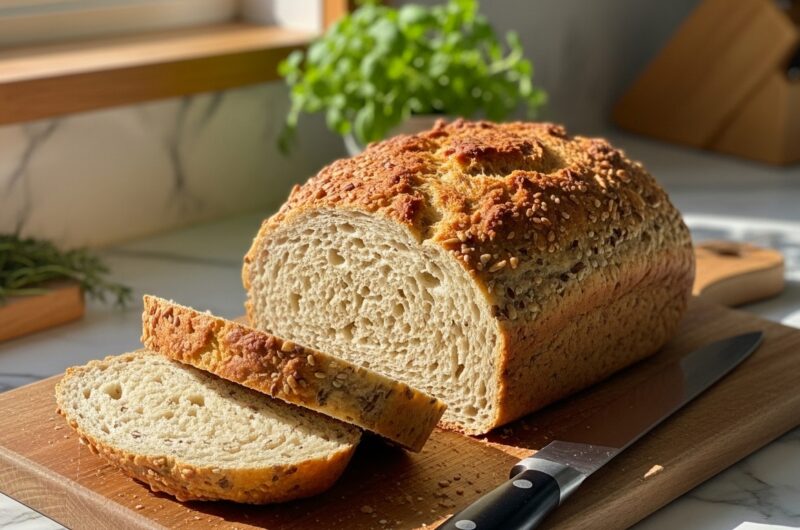
This isn’t just another gluten-free bread recipe; it’s a revelation! If you’ve been on the hunt for a loaf that truly satisfies, with incredible flavor and a texture that holds up to slicing, toasting, and sandwich-making, then your search ends here. This gluten-free seeded bread is packed with wholesome ingredients, making it a nutrient powerhouse that doesn’t compromise on taste. Imagine a slice with a perfectly chewy crumb, studded with a variety of seeds that offer a delightful crunch and earthy notes. It’s the kind of bread that makes you forget it’s gluten-free altogether, fitting perfectly into healthy diets while delivering pure comfort.

The Secret to Great Gluten-Free Seeded Bread
The real magic in achieving that artisan texture and satisfying chewiness in this gluten-free seeded bread lies in a couple of key players: psyllium husk and a well-balanced blend of gluten-free flours. Psyllium husk acts as a natural binder, mimicking the elasticity of gluten, which is crucial for preventing that typical crumbly gluten-free texture. When combined with a thoughtful mix of flours like oat and brown rice, it creates a dough that’s surprisingly pliable and results in a loaf that’s moist, airy, and structured. Don’t skip the psyllium; it’s the unsung hero that elevates this bread from good to truly exceptional.
Pro Tips to Nail It Every Time
Achieving bread-baking success often comes down to a few insider tricks. Firstly, ensure your yeast is active! A small bloom in warm water with a pinch of sugar will save you from a flat loaf. Secondly, don’t rush the proofing process. Gluten-free doughs often need a bit more time and a warm, draft-free spot to rise properly. A trick I picked up is to place the covered bowl in a slightly warm (but turned off) oven. Lastly, for that perfect golden crust, a quick brush with a little olive oil or plant milk before baking works wonders, and a sprinkle of extra seeds just before it goes into the oven adds visual appeal and extra crunch.
Fun Variations to Try
One of the joys of baking this gluten-free seeded bread is its versatility. Feeling adventurous? Swap out some of the seeds for chopped nuts like walnuts or pecans for a richer, more substantial loaf. For a touch of sweetness, consider adding a tablespoon of maple syrup or a handful of dried cranberries or raisins to the dough (especially delicious for breakfast toast!). You could also experiment with different herb blends, adding dried rosemary or thyme for a savory bread perfect with soups. The base recipe is so robust, it invites creativity and adapts beautifully to your cravings.
Final Thoughts
There’s a special kind of warmth that fills the kitchen when this gluten-free seeded bread is baking, a scent that promises nourishment and comfort. It’s more than just a recipe; it’s an invitation to reclaim the joy of homemade bread, even with dietary considerations. Each slice of this artisan-style loaf is a testament to the fact that eating gluten-free doesn’t mean sacrificing flavor or texture. So, roll up your sleeves, gather your ingredients, and prepare to bake a loaf that will surely become a cherished part of your own kitchen adventures. Enjoy every wholesome, delicious bite!
My Favorite Gluten-Free Seeded Bread: Artisan Style!
Course: BreakfastCuisine: AmericanDifficulty: Easy4
servings30
minutes40
minutes300
kcalA remarkably tender, chewy, and nutrient-packed gluten-free seeded bread with an artisan feel. Perfect for sandwiches, toast, or alongside any meal.
Ingredients
1 ½ cups warm water (105-115°F)
2 ¼ teaspoons active dry yeast (1 standard packet)
1 tablespoon honey or maple syrup
2 tablespoons psyllium husk powder
1 cup oat flour (certified gluten-free)
¾ cup brown rice flour
½ cup tapioca starch
¼ cup potato starch
1 teaspoon xanthan gum
1 ½ teaspoons salt
3 tablespoons olive oil, plus more for greasing
¼ cup mixed seeds (e.g., flax, chia, sunflower, pumpkin), plus 1 tablespoon for topping
Directions
- In a large bowl, combine warm water, yeast, and honey/maple syrup. Let sit for 5-10 minutes until foamy, indicating the yeast is active.
- Stir in the psyllium husk powder and let it sit for another 5 minutes to thicken slightly.
- In a separate bowl, whisk together oat flour, brown rice flour, tapioca starch, potato starch, xanthan gum, and salt.
- Add the dry flour mixture and 3 tablespoons of olive oil to the wet ingredients. Mix with a sturdy spoon or stand mixer on low speed until a thick, shaggy dough forms.
- Fold in ¼ cup of the mixed seeds until evenly distributed. The dough will be thick and sticky, not like traditional wheat dough.
- Lightly grease a 9×5 inch loaf pan with olive oil. Transfer the dough to the prepared pan and smooth the top with a wet spatula.
- Sprinkle the remaining 1 tablespoon of seeds over the top of the dough.
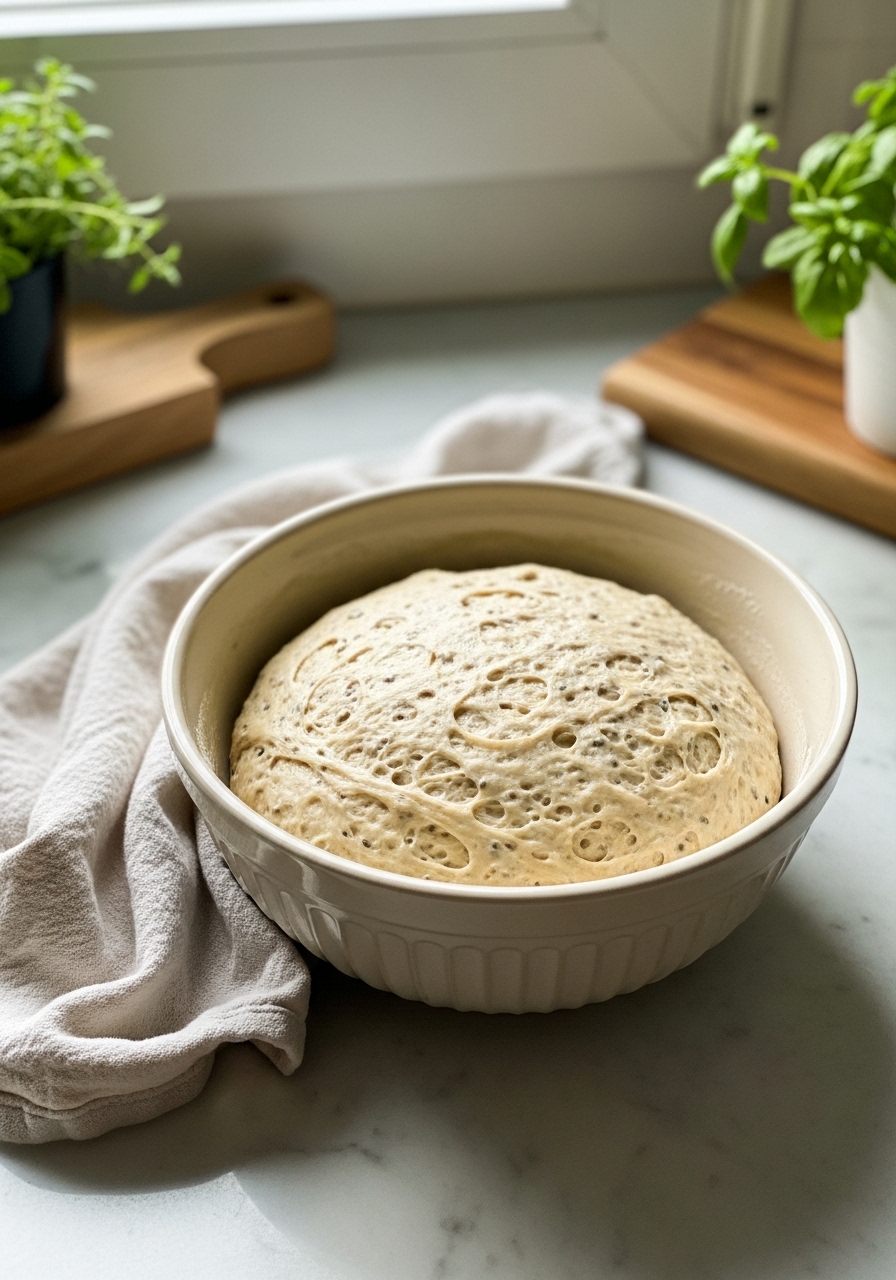
- Cover the loaf pan loosely with plastic wrap or a clean kitchen towel. Place in a warm, draft-free spot for 45-60 minutes, or until the dough has risen by about 50% (it won’t double like wheat bread).
- Preheat your oven to 375°F (190°C) during the last 15 minutes of proofing.
- Bake for 45-55 minutes, or until the crust is golden brown and the internal temperature reaches 200-210°F (93-99°C).
- Remove the bread from the oven and immediately transfer it to a wire rack to cool completely before slicing. This is crucial for texture.
Notes
- Cool Completely: Seriously, resist the urge to slice into this bread while it’s still warm! Gluten-free bread needs to cool entirely, often 2-3 hours, for the starches to set and prevent a gummy texture. Patience is a virtue here!
- Seed Swap: Feel free to customize your seed blend! Sesame, poppy, or even a sprinkle of rolled oats can be added for texture and flavor. Just ensure your total seed amount stays roughly the same.
- Storage Savvy: This gluten-free seeded bread stores beautifully. Keep it in an airtight container at room temperature for 3-4 days, or slice and freeze for up to 3 months. Thaw slices as needed for quick toast or sandwiches!