The Biscuit Mixing Method was the first real challenge I set for myself when I decided to take baking seriously, and I vividly remember the crisp Saturday morning when my kitchen was filled with more flour-dusted frustration than success. I stood defeated by a tray of dense “hockey pucks” until I realized I was manhandling the dough rather than treating it like a delicate pastry, a discovery that led me to study this comprehensive biscuit mixing method guide to truly understand the science of cold butter and tender layers.
Everything changed when I finally pulled a tray of flaky, golden biscuits from the oven, filling the house with the aroma of toasted butter and the quiet satisfaction of a technique finally clicking into place. This breakthrough inspired my Taste Charm philosophy, which teaches that a gentle touch and a lot of patience are the keys to mastering the Biscuit Mixing Method for those airy, cloud-like results we all crave.
Once you have the fundamental technique down, you can start experimenting with flavors, such as the warm, spiced notes found in my apple pie biscuits recipe. This journey from a kitchen failure to a lifelong victory is proof that with the right approach, a few simple ingredients can transform into a reliable friend that greets you every time the craving for a warm breakfast strikes.
The Essential Science of the Biscuit Mixing Method
Understanding the mechanics of the Biscuit Mixing Method is the difference between a dense scone and a towering biscuit. The primary goal is to keep the fat, usually butter, in distinct solid pieces within the flour. At Taste Charm, we treat this process like a delicate dance. When those cold pockets of butter hit the heat of the oven, the water within the fat evaporates into steam. This steam is what physically pushes the layers of dough apart, creating that sought-after flakiness. If the butter is too warm or worked too thoroughly into the flour, it simply coats the grains and produces a short, crumbly texture instead of the sky-high layers we see in the best breakfast spots.
Choosing Your Tools for the Biscuit Mixing Method
While many professional kitchens use elaborate equipment, the best results for the Biscuit Mixing Method often come from the simplest tools found in a home kitchen. A heavy ceramic bowl is excellent for keeping ingredients cool, and our signature wooden cutting board provides the perfect surface for the final folding steps. You do not need a fancy pastry blender if you have two forks or even just your fingertips, provided you work quickly. The key is to minimize the heat transfer from your surroundings to the dough. Keeping your marble countertop clear and using chilled tools ensures the butter remains in its necessary solid state throughout the entire preparation process.
The Secret Folding Step in the Biscuit Mixing Method
One family secret we always share is the importance of the letter-fold during the Biscuit Mixing Method. After the dough has barely come together into a shaggy mass, we turn it onto the board and gently pat it into a rectangle. By folding the dough over itself multiple times, we are essentially creating artificial layers that mimic the structure of puff pastry. This is where Taste Charm really shines, focusing on the tactile feel of the dough rather than a strict timer. You want to see streaks of butter still visible in the dough.
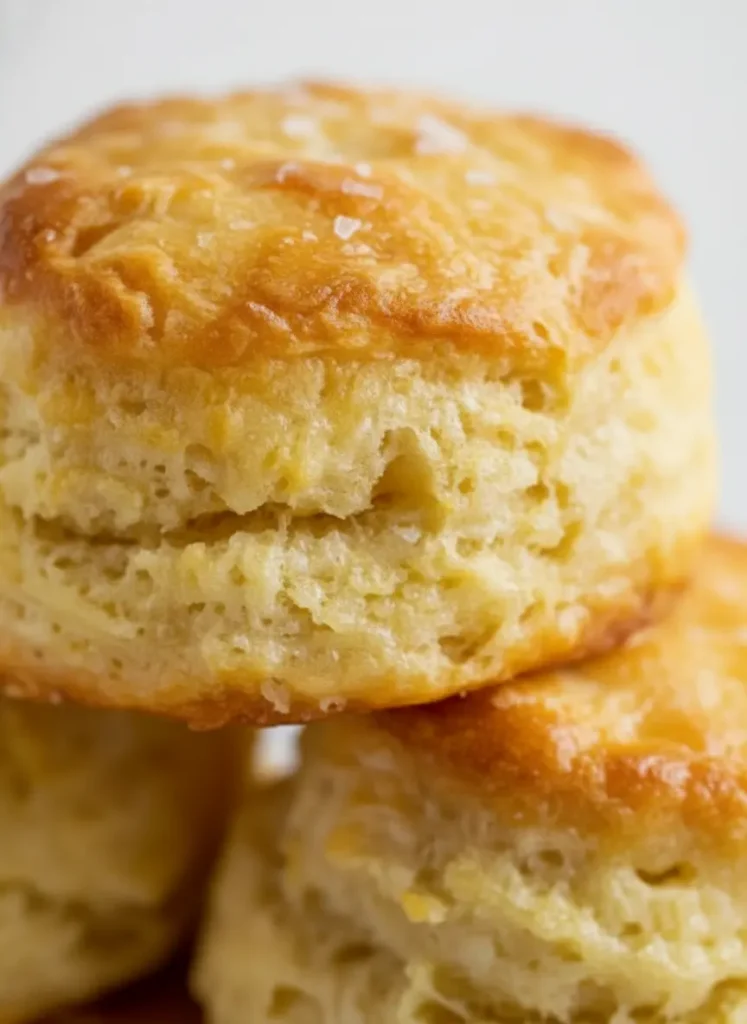
This layering technique ensures that as the biscuits bake, they expand upward in a clean, vertical rise that makes them easy to pull apart with your hands.
Common Pitfalls of the Biscuit Mixing Method
The most frequent mistake people make with the Biscuit Mixing Method is over-handling the dough. It is incredibly tempting to keep kneading until the dough looks smooth and uniform, but in the world of biscuits, smooth is the enemy. A shaggy, somewhat messy-looking dough is actually a sign of success. Another real talk moment: never twist your biscuit cutter. When you press down to shape the dough, a straight vertical motion is required. Twisting the cutter seals the edges of the dough layers together, which prevents the steam from escaping and keeps the biscuit from rising to its full potential. Respect the edges, and they will reward you with height.
Finishing Touches for the Biscuit Mixing Method
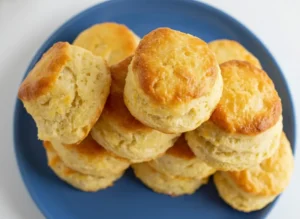
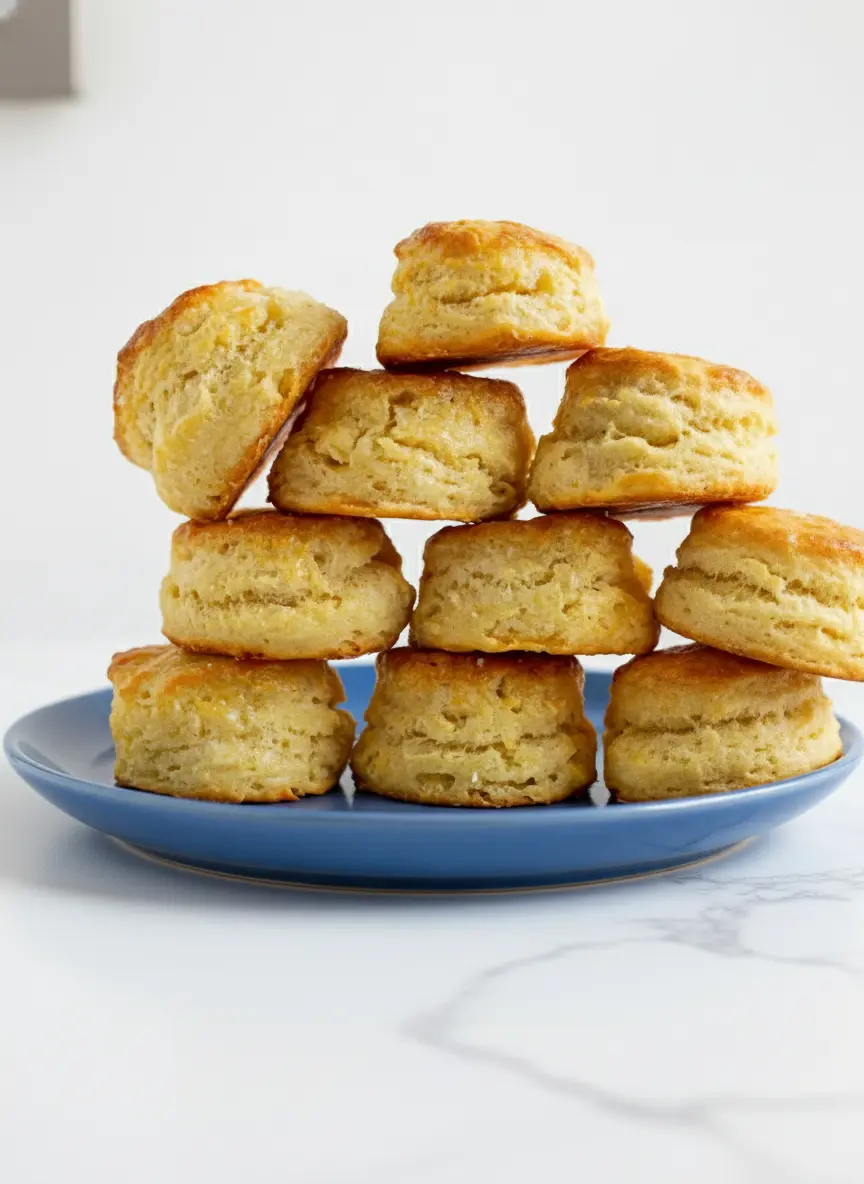
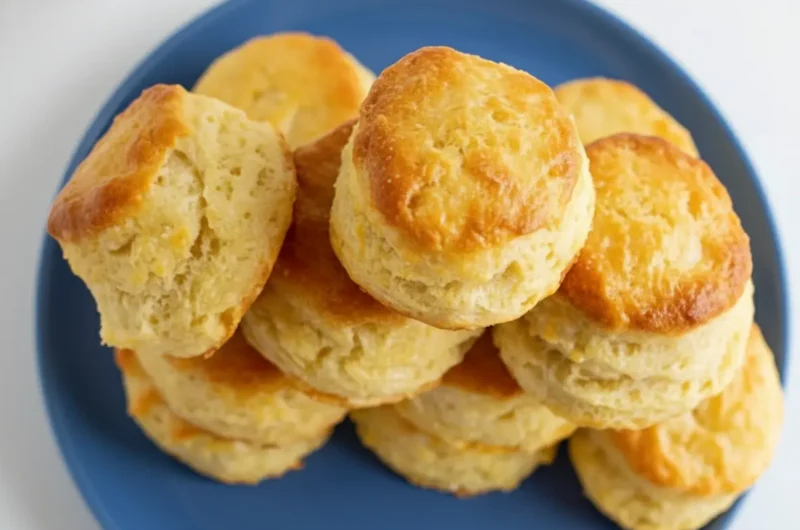
To finish your journey with the Biscuit Mixing Method, a light brush of buttermilk or melted butter on the tops before baking adds that beautiful golden-brown sheen. We love to keep fresh herbs like rosemary or thyme nearby to sprinkle over the finished product if we are leaning toward a savory meal. Once they come out of the oven, let them rest for just a minute on the wooden board. This allows the internal structure to set so they do not crumble the moment you split them open. The result should be a stack of golden, flaky treats that represent the heart of your kitchen adventures. Now, let’s bring this memory to your kitchen…
Mastering the Flaky Biscuit Mixing Method for Perfect Layers
Course: BreakfastCuisine: AmericanDifficulty: Moderate4
servings30
minutes40
minutes300
kcalA masterclass in achieving tall, flaky, buttery biscuits using the traditional biscuit mixing method and a simple folding technique.
Ingredients
2 cups all-purpose flour
1 tablespoon baking powder
1 teaspoon salt
1/2 cup cold unsalted butter, cubed
3/4 cup cold buttermilk
Directions
- In a large ceramic bowl, whisk together the flour, baking powder, and salt until well combined.
- Add the cold, cubed butter to the flour mixture and use a pastry cutter or two forks to cut it in until the pieces are the size of peas.
- Pour in the cold buttermilk and stir gently with a wooden spoon just until a shaggy dough forms.
- Turn the dough onto a floured wooden cutting board and gently pat into a rectangle, then fold it in thirds like a letter and repeat three times.
- Pat the dough to 1-inch thickness, cut with a floured biscuit cutter without twisting, and bake at 425°F for 12-15 minutes.
Notes
- Freeze your butter for 10 minutes before cubing to ensure it stays cold.
- Do not overwork the dough; those lumps of butter are essential for flakiness.
- Make sure your baking powder is fresh for the best rise.