Gluten Free Rosemary Bread – There’s just something truly magical about a freshly baked loaf of bread, isn’t there? That incredible aroma filling your kitchen, the satisfying crackle of the crust, and the promise of a warm, tender bite—it’s pure comfort. For the longest time after embracing a gluten-free lifestyle, I genuinely thought that specific joy was off-limits, convinced that real, artisan-quality bread was simply not in my future.
But oh, how wonderfully wrong I was! This Gluten Free Rosemary Bread recipe, an artisan-style loaf, completely changed everything for me, proving that the joy of homemade bread is absolutely within reach. It’s more than just a substitute; it’s an absolute triumph, boasting a beautifully crisp crust, a delightfully airy interior, and the irresistible, earthy perfume of fresh rosemary, much like the rich flavors in my date-sweetened banana bread. While it takes a little patience, yes, every moment is a loving step towards a truly memorable bite, and for those who love exploring different versions of gluten-free rosemary bread, this one is undeniably a keeper.
Why You’ll Love This Gluten Free Rosemary Bread
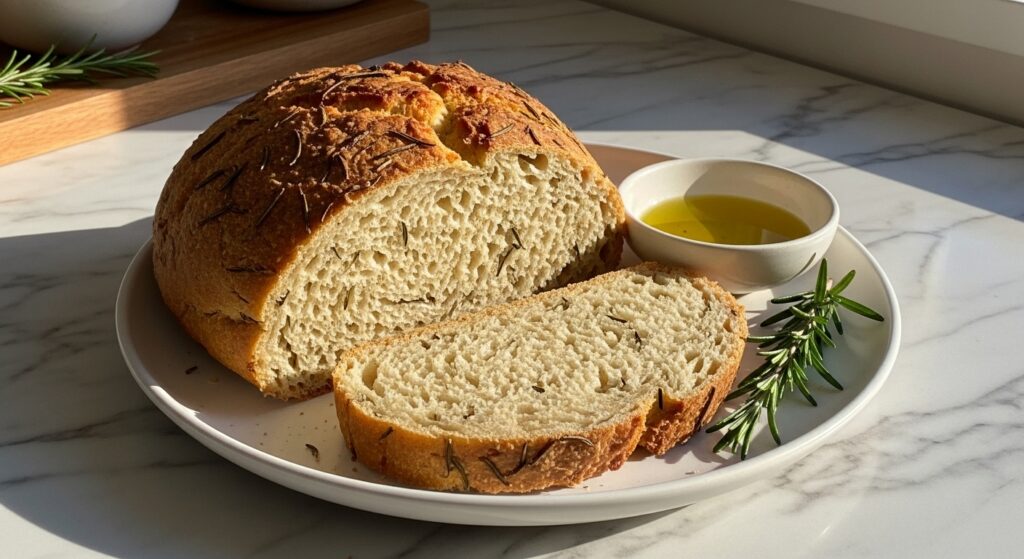
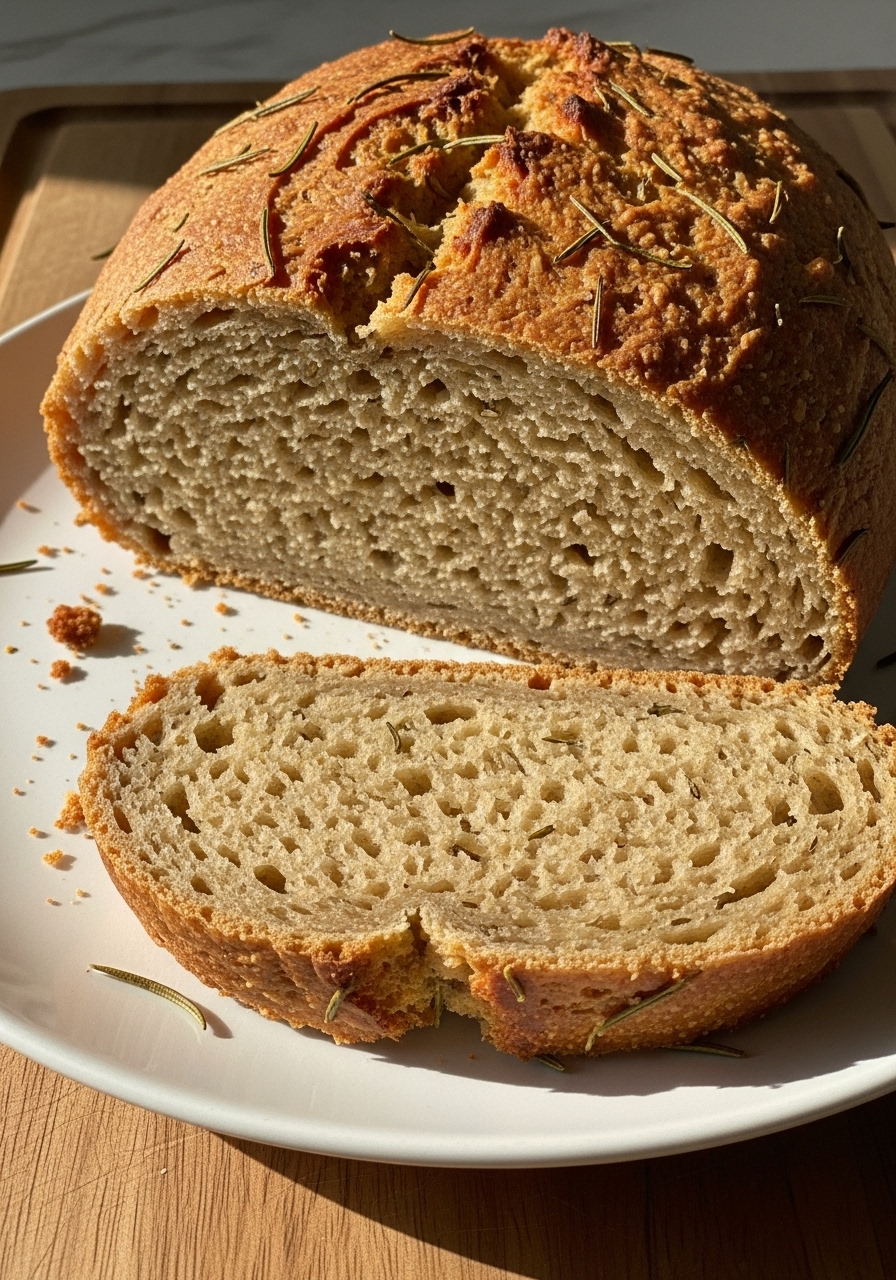
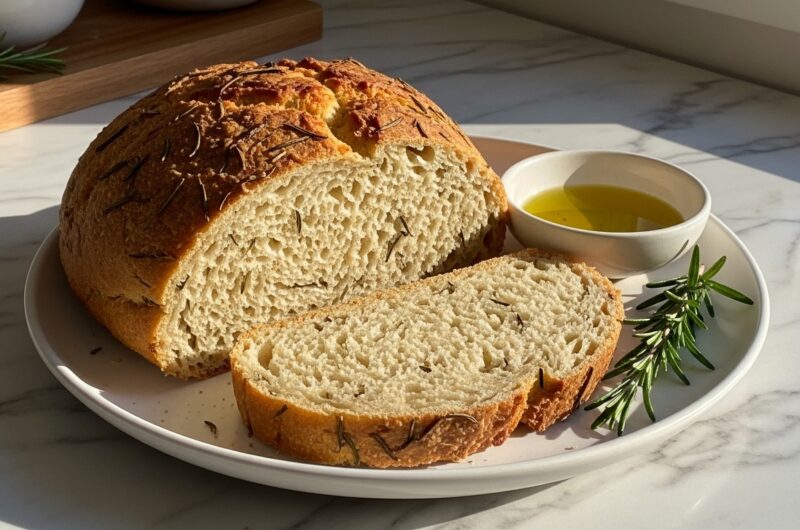
This Gluten Free Rosemary Bread isn’t just any gluten-free bread; it’s an experience. If you’ve struggled to find a gluten-free loaf that stands up to its gluten-full counterparts, prepare to be amazed. Our recipe delivers an incredible texture—a wonderfully crisp, golden-brown crust gives way to a soft, open crumb that actually tears and chews like real bread. The fresh rosemary infuses every slice with an aromatic, savory goodness that’s perfect for dipping in olive oil, alongside a cozy soup, or simply toasted with a dollop of butter. It’s truly a testament to what’s possible in gluten-free baking, transforming what can sometimes feel like a limitation into a delicious triumph.
The Secret to Great Gluten Free Rosemary Bread
The real magic behind this artisan Gluten Free Rosemary Bread lies in a few key elements that often get overlooked. First, it’s all about the flour blend. We use a specific combination of gluten-free flours that mimic the structure and elasticity often provided by gluten, ensuring a delightful chew rather than a crumbly mess. Secondly, hydration is crucial; gluten-free dough tends to be much wetter than traditional dough, and embracing that sticky texture is vital for an airy crumb. Lastly, a long, slow fermentation process allows the flavors to deepen and the yeast to work its wonders, creating those beautiful air pockets and the signature ‘artisan’ feel. Trust the process, even if the dough seems a little unconventional!
Pro Tips to Nail It Every Time
Achieving that perfect artisan loaf of Gluten Free Rosemary Bread takes a few tricks up your sleeve. One of my favorite ‘family secrets’ is using a Dutch oven. Preheating it in your oven creates a super-hot, steamy environment, which is absolutely essential for developing that glorious, crackly crust. Another tip: don’t be afraid of a little steam during baking; placing a tray of hot water at the bottom of your oven for the first part of baking can work wonders if you don’t have a Dutch oven. Also, resist the urge to slice into it immediately! Letting the bread cool completely allows the internal structure to set, preventing a gummy texture and ensuring those beautiful slices you’re dreaming of.
Fun Variations to Try Gluten Free Rosemary Bread
While this Gluten Free Rosemary Bread is perfect as is, it’s also a wonderful canvas for your culinary creativity. Feel free to play around with different add-ins! For a Mediterranean twist, try folding in a quarter cup of chopped Kalamata olives and a few sun-dried tomatoes during the final mix. If you’re a cheese lover, a sprinkle of grated Parmesan or nutritional yeast for a dairy-free cheesy flavor would be fantastic. You could also swap out the rosemary for other fresh herbs like thyme or oregano, or even a mix of ‘herbs de Provence’ for a different aromatic profile. Don’t be shy; make this loaf truly your own!
Final Thoughts
Baking this Gluten Free Rosemary Bread has become one of my most cherished kitchen adventures. It’s a recipe that reminds me that delicious, comforting food is always within reach, no matter the dietary needs. There’s an immense satisfaction in pulling a golden, fragrant loaf from the oven, knowing you made it yourself. It’s about more than just bread; it’s about warmth, connection, and the simple, profound joy of sharing something truly special. So, gather your ingredients, embrace the process, and get ready to create a loaf that will surely become a beloved staple in your home. Happy baking, my friends!
Artisan Gluten Free Rosemary Bread: A Cozy Loaf
Course: BreakfastCuisine: EuropeanDifficulty: Medium4
servings30
minutes40
minutes300
kcalA fragrant, artisan-style Gluten Free Rosemary Bread with a perfectly crusty exterior and a soft, airy interior, infused with fresh rosemary. A true triumph in gluten-free baking!
Ingredients
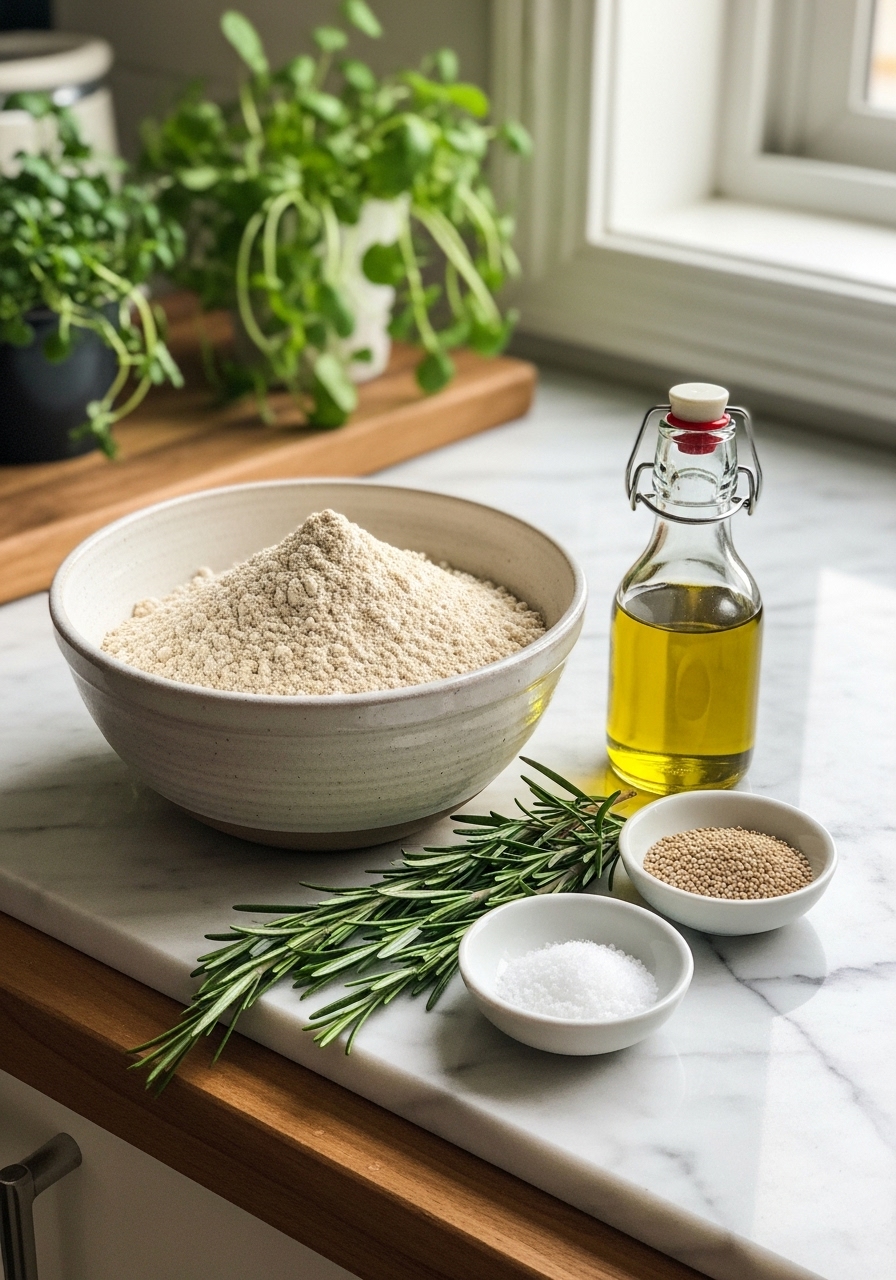
2 cups (240g) gluten-free all-purpose flour blend (containing xanthan gum)
1/2 cup (60g) brown rice flour
1/4 cup (30g) tapioca starch
1 1/2 teaspoons active dry yeast
1 teaspoon granulated sugar or honey
1 1/2 teaspoons fine sea salt
1 tablespoon fresh rosemary, finely chopped (plus extra for garnish)
1 3/4 cups (420ml) warm water (105-115°F / 40-46°C)
2 tablespoons olive oil (plus extra for brushing)
Directions
- In a large bowl, whisk together the gluten-free all-purpose flour blend, brown rice flour, and tapioca starch. Set aside.
- In a separate small bowl, combine the warm water, yeast, and sugar. Let it sit for 5-10 minutes until foamy, indicating the yeast is active.
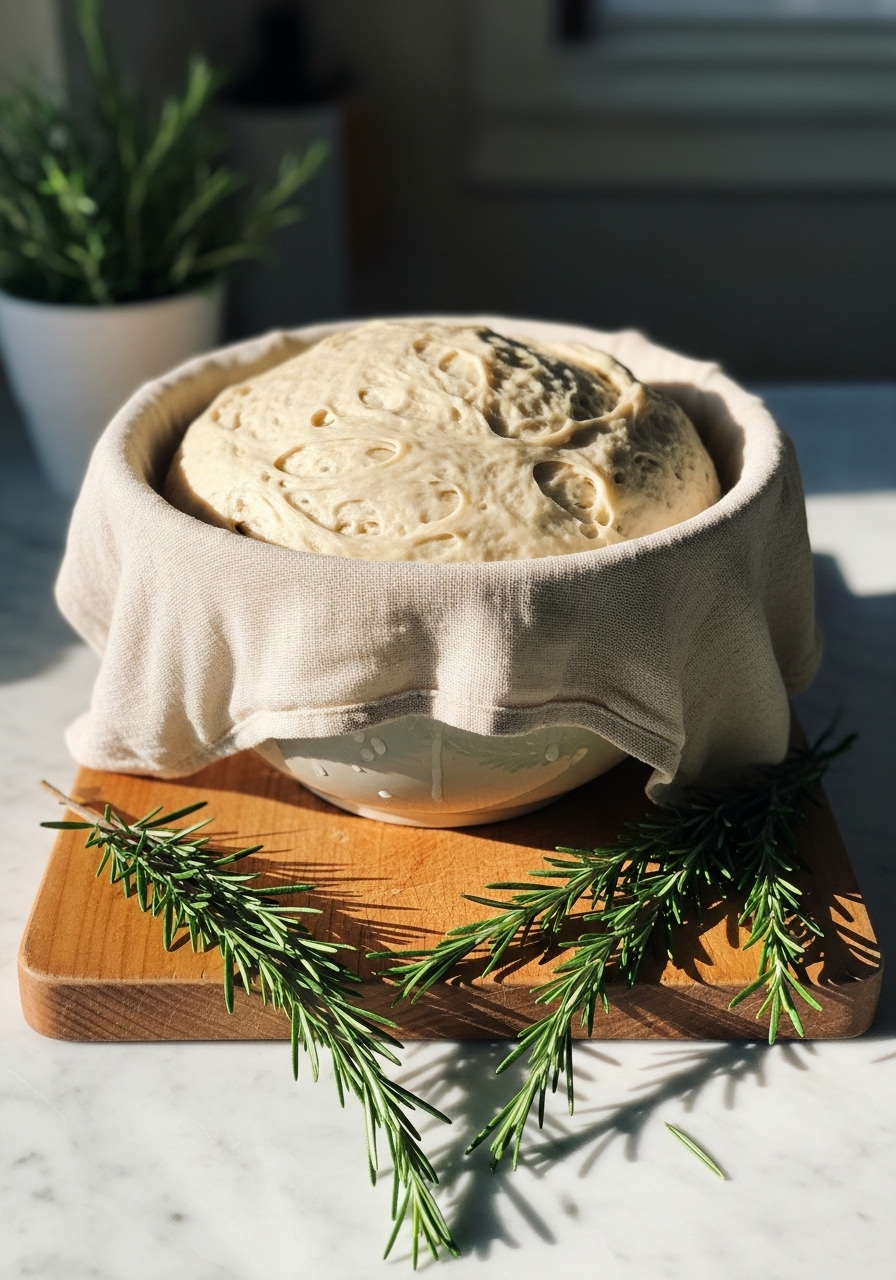
- Add the active yeast mixture, salt, chopped fresh rosemary, and olive oil to the dry ingredients. Mix with a wooden spoon or spatula until a shaggy, sticky dough forms. Do not overmix; gluten-free dough is often wetter.
- Cover the bowl with plastic wrap or a damp kitchen towel and let it rise in a warm place for 1.5-2 hours, or until doubled in size. This can take longer depending on your kitchen temperature.
- While the dough is rising, place a Dutch oven with its lid into your cold oven and preheat to 450°F (230°C). Allow it to preheat for at least 30 minutes once the oven reaches temperature.
- Carefully remove the hot Dutch oven from the oven. Gently transfer the risen dough into the hot Dutch oven. You can shape it slightly with wet hands, but avoid deflating it too much. Brush the top with a little olive oil and sprinkle with a few extra rosemary sprigs if desired.
- Cover the Dutch oven with its lid and bake for 30 minutes. Remove the lid and continue baking for another 15-20 minutes, or until the crust is deeply golden brown and sounds hollow when tapped.
- Carefully remove the bread from the Dutch oven and place it on a wire rack to cool completely before slicing. This is crucial for the best texture.
Notes
- The Flour Blend is Key: The right gluten-free flour blend makes all the difference! Look for one that explicitly states it contains xanthan gum, or add 1/2 teaspoon of xanthan gum if yours doesn’t, as it’s essential for structure in gluten-free baking. Each blend can absorb liquid differently, so feel free to add a tiny splash more water if your dough feels too stiff, or a sprinkle more flour if it’s too wet.
- Don’t Rush the Rise: Gluten-free dough often takes longer to rise than traditional dough. Be patient! A slow, steady rise in a warm, draft-free spot is crucial for developing good flavor and texture. If your kitchen is cool, try placing the bowl in a slightly warm (but not hot) oven that has been turned off, or even near a sunny window.
- Crispy Crust Secret: For that ultimate artisan crust, make sure your Dutch oven is super hot before adding the dough. The initial burst of heat and steam from the covered pot creates that beautiful, crisp exterior. Once the lid comes off, the direct heat helps it brown perfectly. Resist the urge to peek too often; consistent heat is your friend here!